Sunday, June 14

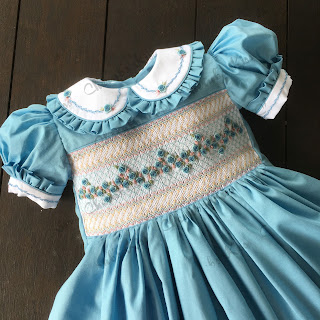
Some of the customs from 2020

So I've sadly neglected my blog as I've been so busy but I'm going to try and post alot more.

So here's some eye candy for you.

Please note I am fully booked for custom orders for the remainder of 2020.  I have a grandbaby due towards the end of July and will be away from my workspace for several weeks. I also close for a month after Christmas.   I am working as fast as I can but smocking and embroidery is time consuming and I put my all into my garments, so there is no rushing them to get the finish that I love and your cherub deserves.

You can find any ready mades listed on my facebook page at this stage or via Firefly Collective once a month.

If you are already on my waitlist you can find it on the pinned post on my facebook page

My FAQs including newseltter sign up are here


Friday, October 11

Tilda Old Rose Showcase

So I was kindly invited to join into the Tilda Australia Old Rose Showcase featuring the latest gorgeous range by Tilda  - it is absolutely perfect for smocking, quilting, little girls clothes and any variety of bags.

I chose to smock a bishop dress for a 12 month old baby and team it with ruffled knickers. 


You can use any bishop pattern that you love to make the dress/top - length is entirely up to you mine is a shorter length to show off those lovely ruffled knickers.

If you would like to replicate a similar design you'll need the following


Bishop pattern - these are available in lots of Australian Smocking and Embroidery Magazine which you can find on eBay or Create in Stitch, or Children's Corner also have lovely bishop patterns.

French Val Lace for the sleeves and hem - I used champagne as it was the best colour match to the Lydia Blue Colourway in the Old Rose Fabric Range

Pleat 9 full space rows including one holding row at the top - I use quilting thread when pleating bishops as its a bit more sturdy.   Block your bishop pattern before starting to smock.

Smocking - I used 3 strands throughout 

Lavender  DMC340
Mint - this was from my stash (with no number ,.. oops)  So just to match the leaves.

There are four rows of two step trellis alternating between lavender and mint  making sure you centre the design.

Leaving half a space I then completed a baby wave - 3 cable combination in the lavender.

again leaving half a space I completed 3 rows of two step trellis in mint 


Then combined this with a five step trellis to make hearts and completed 3 rows of this with a half row between each alternating the mint and lavender again.

For the sleeves I pleated 7 half space rows and flattened out the pleats, attached my lace and the smocked the sleeves with a two step trellis with the lavender on the inner diamond and the mint on the outer.   Remove pleating threads.

Once completed remove your pleating threads except for the top holding row as this aids in construction. 


Embroidery - I like to complete mine before sewing up the garment as you have less fabric everywhere.

I used 2 strands for the embroidery except the leaves.

Centre Bullions - 12 wrap bullion loop DMC 3350
Middle Bullions - 12 wraps x 3 DMC 602

Outer Bullions - 12 wraps x 5 DMC 3689 and then I added a further 12 wraps x 3 to the bottom of the rose for a fuller look.

Mint was used for the leaves.

2 petal lazy daisy in DMC 712 with a french knot 745 centre

2 cast on stitch leaves in the lavender

Please see close up for details.


Knickers - I used the Tie Dye Diva Ruffled Bloomers pattern and utilised the Lydia Blue and teamed it with Angel scraps collection in Colour 110008 and 110005 


Thank you to Two Green Zebras for trusting me with the beautiful fabric to make gorgeous garments yet again.

You can find The Old Rose Collection at Utopian Threads, Fabric Pixie and Oz Material Girls along with lots of other quilt stores.

If you'd like to see more yummies made with the Old Rose Fabric, pop on over and visit all the lovely designers in the showcase along with the following hashtags on Instagram #tildaoldrose, #tildaoldroseshowcase, #tildaaustralia, #tildafabrics

DATEDAYDESIGNER
27thFridayA SPOONFUL OF SUGAR
28thSaturdayMOLLY AND MAMA
29thSundayRUBY SEW OH
30thMondayFRANCES LILLY DESIGNS
1stTuesdayELLIES HANDMADE
2ndWednesdayA SWEET LIFE
3rdThursdayA LITTLE PATCHWORK
4thFridayARABESQUE SCISSORS
5thSaturdayLILABELLE LANE
6thSundayKASHZALE HANDMADE COSMETIC BAGS
7thMondayPICCOLO STUDIO
8thTuesdayPATCHWORK AND ME
9thWednesdayPRETTY LITTLE POPPETS
10thThursdayJENNY OF ELEFANTZ
11thFridayCHERUB'S KISS
12thSaturdayPETALS AND PATCHES
13thSundayDEER DARLING DOLLS
14thMondayTHE BIRD HOUSE
15thTuesdayAQUA PAISLEY


Saturday, January 5

Hang about Toiletry Bag - Andrie Designs

So way late in my Christmas sewing - aka didn't do any.  But I'm trying to catch up now, though a dodgy hand is slowing me up on that :(

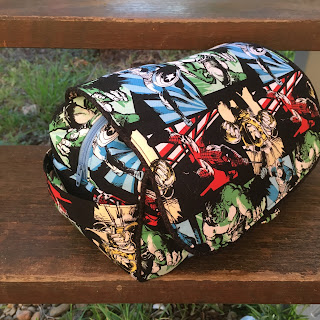
Anyways this one is for Iain.  


I knew I wanted a toiletry bag and I tossed up between this and the Retreat Bag, but in the end, this one has pockets and it can be hung up, so it won. 

As it happened, I was in my local quilt store picking up a piece of fabric required for a project (again overdue) and turned to leave and saw Odicoat.  So of course I had to grab some of it cause I've heard nothing but good things about it. 


I've had this lovely pattern for quite some time.  It came in a three pack which included Hang About Toiletry Bag by Andrie Designs, Grace Travel Satchel by RLR Creations and Tiny Essentials Tote Bag by Little Moo Designs. 

When my daughter and her hubby visit I noticed they didn't have a wet pack to travel with their bathroom items, so I thought this was the perfect opportunity to make one.

I am also trying to downsize my stash, so this is part of it.


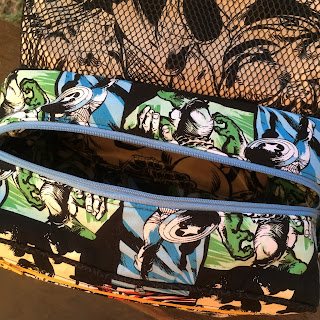
The pattern was clear and concise.    Photos and instructions were easy to follow.   I only made one oops and that was the inside of the top cover - mine is upside down - I have made a note on the pattern so I know which way in future that I would put a directional print.  Fortunately since it was covered with mesh you can't really tell. 


I used Odicoat on the entire interior of the zipped part - I didn't use it on the front flap, I felt that was unneccesary.   The Odicoat was easy to apply and sewing up the laminated cotton was not difficult.  I think it was easier to sew than purchased laminated cotton to be honest.  I didn't find it necessary to use a teflon foot, though I did lengthen the stitch length somewhat. 

I found it quite easy to line, though next time I will be a bit more circumspect with sizing.   


I did use a smaller cording, as I prefer the smaller piped look.   I also would probably leave the hanging hook off it next time as I think you could just use the other findings to hang it.   I would also quite probably use foam next time, at least for the base part to give it a bit more oomph.  I used interfacing and fleece Pellon 640 this time, but my interfacing might need a bit more body.   It certainly stands by itself, but I think I'd like it firmer.

Its a relatively quick sew I think for a bag, and I did it over a few days which just a couple of hours each day - I think it would be much faster next time. 


Pattern - Hang About Toiletry Bag by Andrie Designs 
Fabric - Marvel from Stash
Bag Hardware - Betty Box Pleat
Label - Kylie and the Machine